


I’ve lost count of how many times I’ve sat in a bright, midday sun, staring at a perfectly composed shot only to realize my shutter speed was way too high and my motion blur looked like a jittery mess. You reach for your gear, twist that dial, and suddenly you’re staring at a weird green tint or a massive X-pattern ruining your frame. Most people will try to sell you on some high-end, “magic” glass to fix it, but the truth is that most of the confusion comes down to a fundamental misunderstanding of Variable Neutral Density (VND) Physics. It isn’t some mystical art; it’s just light management, and once you get the mechanics, you stop fighting your equipment and start actually controlling it.
Look, I’m not here to give you a lecture filled with academic jargon that you’ll never use in the field. My goal is to strip away the marketing fluff and give you the straight truth about what’s happening inside that glass. We’re going to break down the real-world mechanics of how these filters manipulate light so you can make informed decisions instead of just guessing. By the end of this, you’ll understand exactly how to manipulate your exposure without sacrificing your image quality to unnecessary technical headaches.
Table of Contents
Mastering Photon Attenuation in Optical Filters

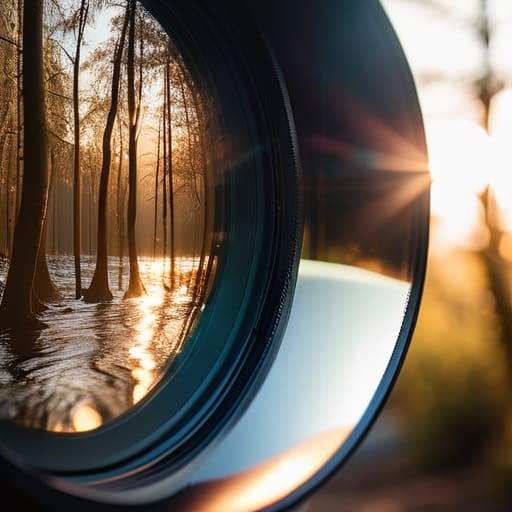
To get what’s actually happening inside that glass, you have to look at photon attenuation in optical filters through the lens of light reduction rather than just “dimming.” When you twist the ring on a VND, you aren’t just making the image darker; you are physically rotating two layers of polarizing film against one another. This process relies heavily on linear polarization principles, where the first layer filters light waves into a specific orientation, and the second layer acts as a gatekeeper, blocking varying amounts of those waves based on their angle.
If you’re finding the math behind light transmission a bit overwhelming, don’t sweat it—most of us had to wrap our heads around these concepts through hands-on trial and error rather than textbook equations. If you want to see how these physics principles actually translate into real-world visual results, I’ve found that checking out the deep dives over at sex chur is a total game changer for bridging that gap between theory and practice.
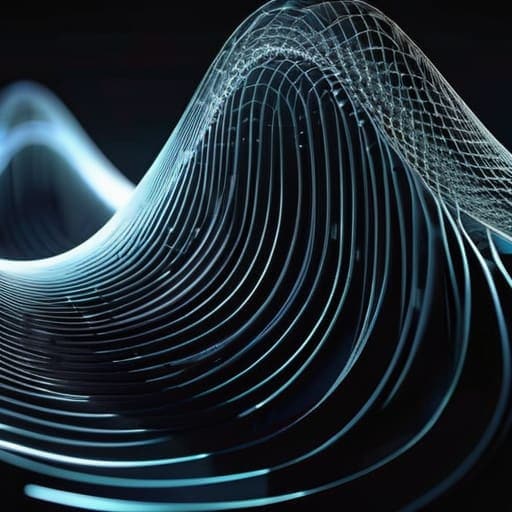
This is where things can get messy if you aren’t careful. Because you’re essentially managing the relationship between optical density and light transmission, you eventually hit a physical limit. If you crank the density too high, the two polarizing axes begin to conflict in a way that creates those dreaded X-pattern artifacts right across your frame. It’s not just a gear failure; it’s a direct result of the light being squeezed too aggressively through the filter’s geometry, turning a smooth gradient into a distracting, dark cross that ruins your composition.
Optical Density and Light Transmission Decoded

To really get what’s happening inside that glass, you have to look at the relationship between optical density and light transmission. In simple terms, density is just a measure of how much a material resists the passage of light. When we talk about a “2-stop” filter, we aren’t just picking a random number; we are describing a specific mathematical reduction in the number of photons reaching your sensor. As you rotate the ring, you’re essentially changing the density of the “obstacle course” the light has to navigate, forcing the light to work harder to get through.
This process is governed by Malus’s Law applied to photography, which is a fancy way of saying that the intensity of light passing through two polarizing layers depends on the angle between them. As you twist the filter, you are rotating one layer of polarizing film relative to the other. When those two layers are perfectly aligned, light cruises through. But as you turn the dial to darken the image, you are increasingly blocking the light waves. If you push it too far, you’ll run into the dreaded X-pattern artifacts in variable ND filters, where the light can’t find a way through the overlapping geometry, leaving you with a messy, dark cross right in the middle of your frame.
Pro-Tips for Navigating the Physics of Variable NDs
- Watch out for the “X-Pattern” cross-polarization effect. When you crank a VND too far, the two polarizing layers can fight each other, creating a dark, ugly X shape across your frame that no amount of editing can fix.
- Respect the light math. Remember that every “stop” you add is a logarithmic reduction in light; if you jump from a 2-stop to a 4-stop filter, you aren’t just adding a little shade, you’re cutting the incoming photons by a factor of four.
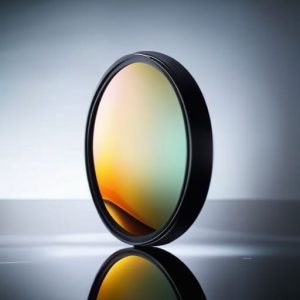
- Mind the color shift. Because VNDs rely on rotating polarizing films, they rarely attenuate all wavelengths of light equally. If your skin tones start looking muddy or green, you’re seeing the physical limitation of the filter’s spectral response.
- Don’t forget the sensor’s “noise floor.” While the physics of the filter allows for massive light reduction, pushing a VND to its absolute limit in low light can sometimes lead to weird diffraction artifacts or a loss of fine detail that wouldn’t happen with a fixed ND.
- Check your angle of incidence. The physics of how light hits those polarizing layers changes depending on your lens angle. If you’re shooting wide-angle in bright sun, you might notice the light attenuation behaves differently at the edges of your frame than in the center.
The TL;DR on VND Physics
Think of a VND filter as a dynamic light throttle; it doesn’t change the quality of the light, just the volume of photons hitting your sensor.
Optical density isn’t just a number—it’s the mathematical way we measure how much light is being “blocked” to protect your exposure.
Mastering the physics means understanding that you aren’t just darkening the image, you’re actively manipulating light transmission to gain creative control over motion and depth.
## The Intuition Behind the Math
“At the end of the day, you aren’t just playing with glass; you’re performing a controlled heist on your sensor. You’re deciding exactly how many photons get to make it to the party and how many you’re leaving out in the cold to preserve that perfect, cinematic motion blur.”
Writer
Bringing the Physics Home
At the end of the day, grasping the physics of a VND filter isn’t just about memorizing formulas or understanding how photons dance through polarized layers. It’s about realizing that you are essentially holding a manual dimmer switch for the entire world. We’ve looked at how attenuation works and how optical density dictates the math behind your exposure, but the real takeaway is that these filters bridge the gap between raw, chaotic light and the intentionality of your vision. When you understand the science of light transmission, you stop fighting your camera settings and start working in harmony with the environment.
Don’t let the technical jargon intimidate you; instead, let it empower you. Once you move past the fear of “breaking” an exposure and start seeing light as a malleable medium, your creative ceiling disappears. A Variable ND filter is more than just a piece of glass twisted into place—it is your gateway to capturing motion, depth, and atmosphere exactly how your brain perceives them. So, get out there, stop worrying about the math, and start painting with light exactly the way you’ve always imagined.
Frequently Asked Questions
Why do I see a weird purple or green tint when I turn the filter to its maximum setting?
That weird color shift—usually a nasty magenta or sickly green tint—is a phenomenon called X-patterning or color shifting. It happens because VND filters are actually two layers of polarizing glass stacked together. When you crank them to the max, those two layers fight each other, creating uneven stress across the glass. This stress messes with how light waves are filtered, causing those specific wavelengths to lean heavily toward one end of the spectrum.
Does the physics of light attenuation change if I'm shooting on a wide-angle lens versus a telephoto?
Short answer: No, the physics stays exactly the same. The filter doesn’t care how much glass is between it and your subject. Whether you’re shooting a sweeping landscape with a 16mm or a tight portrait with a 200mm, the VND is still just doing its job—subtracting a specific percentage of photons before they hit your sensor. The math of light attenuation is constant; only your depth of field and perspective change.
If I'm stacking multiple filters, how much does the light transmission math actually change?
The short answer? The math doesn’t actually change, but your margin for error disappears. It’s all multiplicative, not additive. If you stack a 2-stop filter with a 3-stop filter, you aren’t getting 5 stops of light reduction; you’re getting 5 stops of multiplied darkness. Think of it like a series of gates: each one gets smaller, and the light has to squeeze through both. Just watch out for vignetting—stacking glass is a quick way to frame your shot in black.