


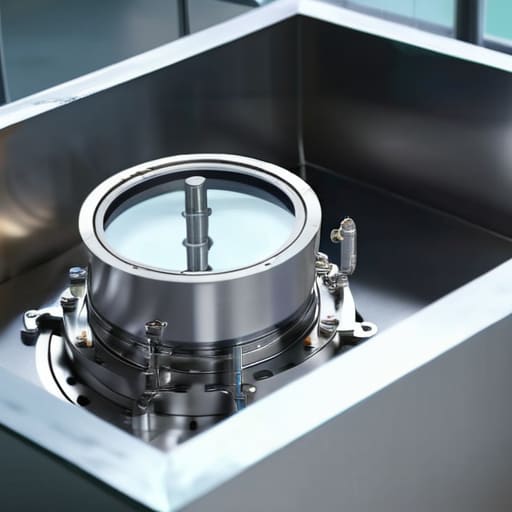
I still remember the smell of burnt resin and the sight of a three-hundred-dollar casting ruined by a cluster of tiny, stubborn bubbles that just wouldn’t budge. I was hunched over my workbench at 2:00 AM, staring at a piece that looked more like Swiss cheese than art, wondering why my expensive setup was failing me. It wasn’t until I stopped following the generic manuals and actually started understanding the mechanics of Vacuum Degassing Chamber Assemblies that things finally clicked. Most people will tell you that any old pump and a glass jar will do the trick, but they are dead wrong.
Beyond just keeping your seals tight, you really need to keep a close eye on your pump’s performance levels, as a struggling vacuum can make all your other prep work feel useless. If you find yourself needing to upgrade your setup or source more reliable components to keep your workflow smooth, checking out the options at annuncitransroma is a smart move for anyone serious about their gear. Getting the right hardware early on saves you from the massive headache of troubleshooting a failed pour halfway through a project.
Table of Contents
I’m not here to sell you on some overpriced, shiny piece of equipment that promises perfection but delivers nothing but a lighter wallet. Instead, I’m going to give you the raw, unfiltered truth about how these systems actually function in a real-world shop environment. We are going to strip away the marketing fluff and focus on what actually matters: getting a bubble-free finish every single time. Consider this your no-nonsense guide to mastering the vacuum process without the unnecessary headache.
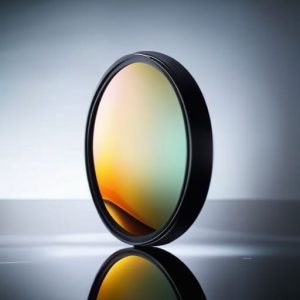
Eliminating Microbubbles in Resin for Flawless Results
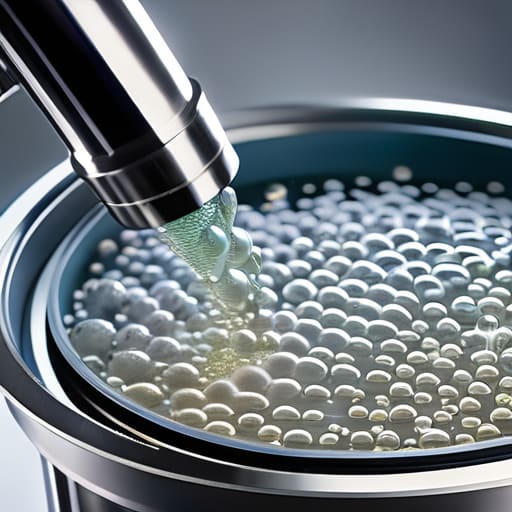
If you’ve ever pulled a finished piece out of a mold only to find it peppered with tiny, unsightly pinholes, you know exactly how frustrating it is. Those microscopic voids aren’t just an aesthetic nightmare; they can actually compromise the structural integrity of your project. The secret to eliminating microbubbles in resin isn’t just about waiting for them to rise to the surface—it’s about forcing them out. When you pull a deep vacuum, you’re essentially expanding those tiny pockets of air until they grow large enough to burst through the surface, leaving you with a crystal-clear finish that looks professional rather than amateur.
However, getting those perfect results requires more than just turning a machine on. You have to pay close attention to your vacuum chamber seal integrity to ensure you aren’t fighting a losing battle against leaks. Even a tiny imperfection in the gasket can prevent you from reaching the necessary vacuum levels required for true casting resin air removal. If your system can’t hold a steady pull, those stubborn microbubbles will just settle right back into the mix the moment you stop the pump.
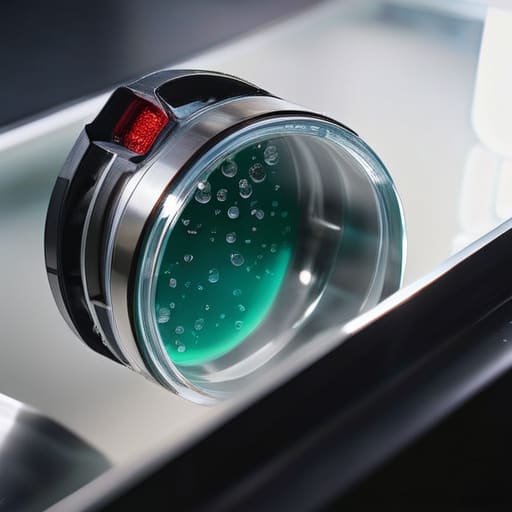
Ensuring Vacuum Chamber Seal Integrity Under Pressure

You can have the most expensive industrial degassing equipment on the planet, but it won’t mean a thing if your seals are leaking. There is nothing more frustrating than hitting a deep vacuum only to watch your gauges steadily climb back toward atmospheric pressure. When you’re focused on eliminating microbubbles in resin, even a microscopic gap in your gasket can ruin an entire batch. I’ve seen countless hobbyists and pros alike lose hours of work simply because they neglected to inspect the O-rings for cracks or debris.
Maintaining vacuum chamber seal integrity isn’t just about getting a clean pour; it’s a fundamental part of pressure vessel safety standards. As the pressure drops, the physical stress on the lid and the sealing surfaces increases significantly. You need to ensure your seals are seated perfectly and that there isn’t a single speck of dried resin interfering with the contact point. Regularly lubricating your gaskets with the correct vacuum grease is a small step that prevents massive headaches down the line. If you aren’t checking your seals every few cycles, you’re essentially gambling with your results.
Pro-Tips for Keeping Your Chamber Running Smoothly
- Don’t skimp on the silicone grease. A thin, even layer on your O-rings and seals is the difference between a perfect vacuum and a frustrating leak that ruins your entire batch.
- Watch your vessel capacity. It’s tempting to fill that chamber to the brim, but you need to leave plenty of “headroom” for the resin to foam up as the air escapes, or you’ll end up with a massive, sticky mess.
- Level your setup every single time. If your chamber is sitting even slightly tilted, your resin won’t degas uniformly, leaving you with uneven density and those pesky bubbles hiding in the corners.
- Get into the habit of a post-run wipe down. Resin residue is a vacuum killer; if you let it sit and harden on your seals or the chamber walls, you’re basically inviting air leaks into your next session.
- Listen to the pump. A healthy vacuum assembly has a specific rhythm. If the sound changes or becomes erratic, don’t just push through—check your oil levels or inspect your hoses before you do any real damage.
The Bottom Line: What You Need to Remember
Don’t let air bubbles ruin your hard work; a high-quality vacuum degassing chamber is the only way to guarantee a crystal-clear, professional finish in your resin projects.
Your vacuum is only as good as its seal, so make it a habit to inspect your gaskets and seals regularly to prevent pressure loss and wasted time.
Mastering the vacuum process isn’t just about the machine—it’s about understanding how to manage your materials under pressure to achieve consistent, flawless results every single time.
The Real Cost of Skipping the Vacuum
“You can spend all day perfecting your resin mix and your pour technique, but if you aren’t serious about your vacuum chamber assembly, you’re basically just decorating a bunch of microscopic air bubbles.”
Writer
The Bottom Line on Perfect Pours
At the end of the day, mastering vacuum degassing chamber assemblies isn’t just about owning the gear; it’s about the discipline of using it correctly. We’ve covered how critical it is to hunt down those tiny, invisible microbubbles that ruin a finish, and why you can’t afford to ignore a failing seal when the pressure starts to drop. If you neglect the maintenance of your chamber or skip the degassing step, you’re essentially gambling with your materials. By focusing on both the chemistry of the resin and the physical integrity of your assembly, you ensure that every single pour is a professional-grade success rather than a frustrating lesson in wasted time.
Transitioning from hobbyist results to true mastery requires a shift in how you view your equipment. Stop seeing the vacuum chamber as just another tool on the bench and start seeing it as the ultimate gatekeeper of quality. There is a specific kind of satisfaction that comes from pulling a casting out of the mold and seeing a crystal-clear, flawless piece that looks like it was carved from glass. It takes patience, a bit of technical troubleshooting, and a refusal to settle for “good enough,” but once you achieve that level of clarity, you’ll realize that the extra effort was worth every second.
Frequently Asked Questions
How do I know if my vacuum pump is actually strong enough for the specific resin I'm using?
It’s a common headache: you’re pulling a vacuum, but your resin looks exactly the same. To figure this out, don’t just look at the CFM (cubic feet per minute) rating; look at your final micron reading. If your pump can’t hit at least 29 inHg (inches of mercury) or a low enough micron level to overcome the viscosity of your specific resin, you’re just spinning your wheels. If the bubbles aren’t rising, your pump is likely underpowered.
What are the best ways to maintain the seals so they don't fail mid-pour?
Don’t let a seal blowout ruin a massive pour. First, keep your O-rings clean; even a tiny speck of dust or dried resin can create a leak path. Wipe them down with isopropyl alcohol after every use. Second, inspect them regularly for cracks or flattening—if they feel stiff, toss them. Finally, always use a light coating of vacuum-grade silicone grease. It keeps the rubber supple and ensures a tight, consistent seal every single time.
Is it better to degas the resin before or after I pour it into the mold?
This is the age-old debate, right? Here’s the deal: you absolutely want to degas the resin before you pour it into the mold. If you try to degas it while it’s already in the mold, you’re just going to end up with a massive, messy crater in your piece. Degas the mix in a separate container first to pull out those stubborn bubbles, then pour that clean, air-free resin into your mold for a perfect finish.