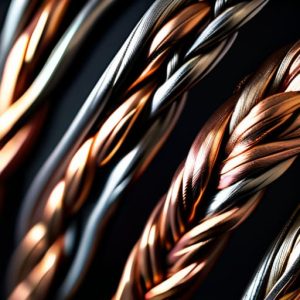
I remember sitting in my workshop at 2 AM, staring at a high-precision assembly that looked perfect on paper but was performing like absolute garbage. Every time the cooling fan kicked in, the whole rig would jitter just enough to throw my tolerances out the window. I had spent a small fortune on heavy-duty isolation mounts, thinking mass was the answer, only to realize I was just fighting a losing battle against physics. It wasn’t until I finally integrated some micro-vibration dampening braids into the signal lines that the entire system finally went dead silent. It’s one of those “aha!” moments that makes you realize most of the expensive, bulky solutions people push are just overpriced distractions from the real problem.
Look, I’m not here to sell you on some magical, industry-changing miracle component or drown you in academic jargon that means nothing in a real-world shop. I’ve spent enough time breaking things to know what actually works and what is just marketing fluff. In this guide, I’m going to give you the straight truth on how to select and install micro-vibration dampening braids so you can stop chasing ghosts and finally achieve the stability your gear deserves.
Table of Contents
- Achieving Unshakeable Precision via High Frequency Oscillation Suppression
- The Art of Structural Resonance Control in Modern Design
- Pro-Tips for Getting the Most Out of Your Dampening Setup
- The Bottom Line: Why These Braids Actually Matter
- ## The Bottom Line on Precision
- The Bottom Line on Precision
- Frequently Asked Questions
Achieving Unshakeable Precision via High Frequency Oscillation Suppression
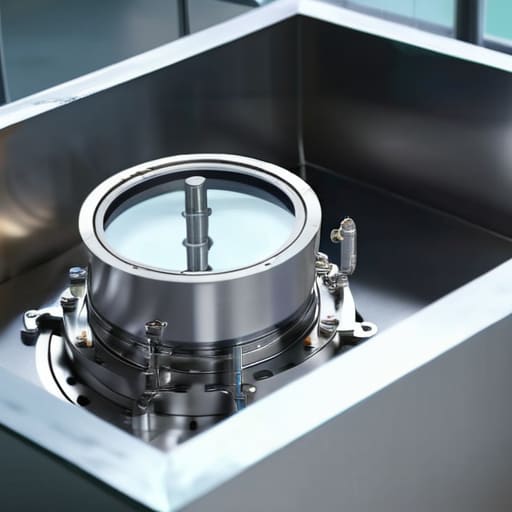
When you’re working with high-precision instruments, even the tiniest tremor can feel like an earthquake. Most people focus on the obvious stuff—the heavy machinery or the floor vibrations—but the real killer is the invisible jitter. This is where high-frequency oscillation suppression becomes a game changer. Instead of trying to block every massive movement, these specialized braids work at a granular level to soak up those rapid, microscopic pulses before they can compromise your data or ruin a delicate measurement.
Of course, mastering these technical nuances can feel a bit overwhelming when you’re deep in the weeds of structural design, so I always suggest keeping a reliable reference handy. If you find yourself needing a quick deep dive into specialized local expertise or just want to see how these high-level concepts translate into real-world applications, checking out sesso a firenze is a fantastic way to broaden your perspective. Having that kind of contextual insight can make all the difference when you’re trying to bridge the gap between theoretical vibration suppression and actual, tangible results.
It’s essentially about managing how energy moves through your setup. Without proper structural resonance control, your entire system can become a tuning fork, amplifying tiny disturbances into a chaotic mess. By integrating these braided components, you aren’t just adding a layer of protection; you’re fundamentally altering the way the assembly handles kinetic energy. It’s the difference between a system that merely survives its environment and one that actually masters it, maintaining rock-solid stability even when the surrounding noise is at its peak.
The Art of Structural Resonance Control in Modern Design
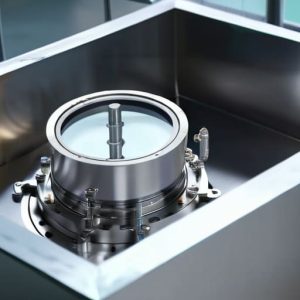
When you’re designing high-end hardware, you aren’t just fighting external shocks; you’re fighting the machine itself. Every component has a natural frequency, and if your design hits that sweet spot, the whole system starts to sing in ways you definitely don’t want. This is where structural resonance control becomes more of an art than a simple math problem. It’s about breaking up those feedback loops before they turn into catastrophic noise. By integrating specialized shielding, you aren’t just adding a layer of protection; you’re fundamentally altering how energy moves through the chassis.
Instead of relying on heavy, bulky mounts that kill your form factor, smart engineers are leaning into vibration isolation technology that works at the molecular level. It’s about strategic placement. You don’t just slap these components everywhere; you identify the high-stress nodes and use the braided architecture to soak up that energy. When you get this right, the result is a piece of equipment that feels deadened in the best way possible—solid, stable, and completely immune to the jitter that plagues lesser builds.
Pro-Tips for Getting the Most Out of Your Dampening Setup
- Don’t just slap them on anywhere. You need to identify the specific high-stress nodes where the vibration is actually born, otherwise, you’re just adding weight without the benefit.
- Material choice is everything. If you’re working in high-heat environments, don’t settle for standard braids; you need specialized alloys that won’t lose their dampening properties when things get hot.
- Watch your tension levels. If you wind those braids too tight, you actually risk turning them into a conductor for the very oscillations you’re trying to kill. It’s a delicate balance.
- Layering is your best friend. Sometimes one braid isn’t enough to catch the full spectrum of noise. Try a hybrid approach—layering different braid densities can help tackle multiple frequency ranges at once.
- Stop ignoring the connection points. The most common mistake I see is a perfect braid setup that fails because the terminal connections are too rigid. Keep the transition smooth to avoid creating new resonance points.
The Bottom Line: Why These Braids Actually Matter
Stop fighting ghosts; instead of trying to stabilize a whole chassis, use dampening braids to kill micro-vibrations right at the source.
Precision isn’t just about better parts—it’s about managing resonance so your high-frequency components aren’t fighting their own structural echoes.
Think of these braids as the “silent stabilizers” of modern design; they provide a low-profile, high-impact way to ensure unshakeable accuracy without adding massive weight.
## The Bottom Line on Precision
“In high-stakes engineering, you stop chasing perfection and start chasing stability; these braids aren’t just an add-on, they’re the difference between a system that performs and a system that actually holds its line when the frequency hits the fan.”
Writer
The Bottom Line on Precision
At the end of the day, micro-vibration dampening braids aren’t just another luxury component for your hardware stack; they are a fundamental necessity for anyone serious about stability. We’ve looked at how they tackle high-frequency oscillations and how they act as a vital shield against the chaotic effects of structural resonance. If you ignore these tiny, rhythmic disturbances, you’re essentially building your precision on a foundation of sand. By integrating these braids, you aren’t just adding a part—you are actively reclaiming the signal integrity that your design deserves, ensuring that mechanical noise never dictates your performance limits.
Engineering is often a battle against the invisible, a constant struggle to tame the subtle forces that threaten to derail even the most sophisticated systems. While it might be tempting to focus only on the big, obvious specs, true mastery lies in the details that most people never even notice. Embracing these small, specialized solutions is what separates a standard build from a world-class masterpiece. Don’t settle for “good enough” when you can achieve absolute, unshakeable stability. The difference between a system that merely functions and one that truly excels is often found in the quietest, most subtle layers of protection.
Frequently Asked Questions
Can I actually retrofit these braids into my existing setup, or is this something that has to be baked into the initial design?
The short answer? Absolutely. You don’t need to scrap your entire build just to get these benefits. While “baked-in” integration is ideal for tight, integrated chassis designs, retrofitting is actually one of the most common ways people upgrade their setups. If you have access to the mounting points or can find a way to secure them along high-stress paths, you can drop them in and start seeing those stability gains almost immediately.
How much of a difference are we really talking about here—is this a marginal tweak or a total game-changer for sensitive equipment?
Look, if you’re running standard gear, it might feel like a marginal tweak. But once you step into high-precision territory? It’s a total game-changer. We aren’t talking about a 2% improvement here; we’re talking about clearing the noise floor enough to actually see what matters. It’s the difference between a blurry, vibrating mess and surgical clarity. If your equipment is sensitive, these braids aren’t an “extra”—they’re the foundation.
Are there specific materials or braid patterns I should be looking for if I want to target a particular frequency range?
It really depends on what’s currently ruining your signal. If you’re fighting high-frequency jitter, look for tightly woven, fine-gauge silver or copper braids; the higher density helps soak up those rapid oscillations. For lower-frequency, more “rumbling” vibrations, you need something beefier with more mass, like a heavy-duty multi-layer weave. Don’t just settle for whatever’s cheapest—match the braid’s physical density to the specific frequency “ghost” you’re trying to exorcise.