

I still remember the day I decided to tackle my own DIY craft room organization project – it was a mess of paint-splattered tables, half-finished projects, and enough yarn to knit a sweater for every member of my family. The myth that a creative space has to be chaotic is just that, a myth. In reality, a well-organized craft room can be the key to unlocking your full potential as a crafter. I’ve learned that with a few simple tweaks, you can turn your space into a serene oasis that sparks creativity and productivity.
In this article, I’ll share my top tips and tricks for achieving DIY craft room organization that actually works. You’ll learn how to maximize your storage, create a functional workflow, and maintain your space over time. From repurposed furniture to clever shelving solutions, I’ll give you the honest, no-hype advice you need to transform your craft room into a space that inspires you to create your best work. Whether you’re a seasoned crafter or just starting out, this guide will provide you with the practical tools and inspiration you need to take your crafting to the next level.
Table of Contents
- Guide Overview: What You'll Need
- Step-by-Step Instructions
- Diy Craft Room Organization
- 5 Game-Changing Tips to Supercharge Your DIY Craft Room Organization
- Key Takeaways for a Harmonious Craft Space
- Organizing Your Oasis
- Bringing It All Together: Your Dream DIY Craft Sanctuary
- Frequently Asked Questions
Guide Overview: What You'll Need

Total Time: 4 hours 30 minutes
Estimated Cost: $50 – $100
Difficulty Level: Intermediate
Tools Required
- Drill (with screwdriver and drill bits)
- Tape Measure
- Level
- Pencil
- Utility Knife (with extra blades)
- Hammer
Supplies & Materials
- Shelving Units (customizable to fit space)
- 2-in x 4-in lumber (for building custom shelves)
- Pegboard (for hanging tools and supplies)
- Hooks (for hanging bags and accessories)
- Baskets (for storing small items)
- Label Maker (for labeling storage containers)
- Adhesive Wall Strips (for hanging items without damaging walls)
Step-by-Step Instructions
- 1. First, let’s start by purging the clutter from our craft room. This means getting rid of any broken or unused supplies, and sorting items into categories like paper, fabric, and tools. Take everything out of the room, and sort items into boxes or bins labeled “keep,” “donate,” and “toss.” This will give us a clean slate to work with and help us decide what we really need to keep.
- 2. Next, we need to assess the space and think about how we want to use it. Consider the types of crafts we’ll be doing most often, and what kind of storage and work surfaces we’ll need. Make a list of our must-haves, like a desk for painting or a table for sewing, and think about how we can maximize the room’s potential.
- 3. Now it’s time to start thinking about storage solutions. We’ll need shelves, cabinets, and bins to keep all our supplies organized and within reach. Consider using stackable shelves or drawers to make the most of our vertical space, and look for containers that are specifically designed for craft supplies, like paint jars or yarn baskets.
- 4. With our storage solutions in place, it’s time to start organizing our supplies. Start by grouping similar items together, like all our paints or all our fabrics, and then assign a home for each group. Use labels and signs to help us quickly find what we need, and consider using a pegboard or hooks to hang items like scissors or rotary cutters.
- 5. Once we have our supplies organized, it’s time to think about our work surfaces. We’ll need a comfortable and functional space to work on our crafts, whether it’s a desk, table, or countertop. Consider using a craft mat or other protective surface to keep our work area clean and damage-free, and think about investing in a good chair or stool to make our crafting sessions more comfortable.
- 6. Now that we have our basic setup in place, it’s time to think about lighting and ergonomics. We’ll need good lighting to see what we’re doing, especially if we’re working with small or intricate items. Consider using a combination of overhead lighting and task lighting, like a lamp or under-cabinet light, to illuminate our work area. We should also think about the ergonomic aspects of our craft room, like the height of our work surfaces and the comfort of our seating.
- 7. Finally, let’s think about making our craft room a inspiring space. We can add some personal touches like photos, artwork, or plants to make the space feel more welcoming and creative. Consider using a vision board or inspiration board to display our ideas and goals, and think about playing music or nature sounds to create a relaxing and stimulating atmosphere.
Diy Craft Room Organization

To take your craft room to the next level, consider craft room storage solutions that cater to your specific needs. For instance, if you’re a painter, you’ll want to prioritize storage for your canvases, paints, and brushes. On the other hand, if you’re a sewer, you’ll need ample space for your fabrics, threads, and sewing machine. By tailoring your storage to your craft, you’ll be able to find what you need quickly and easily, saving you time and frustration.
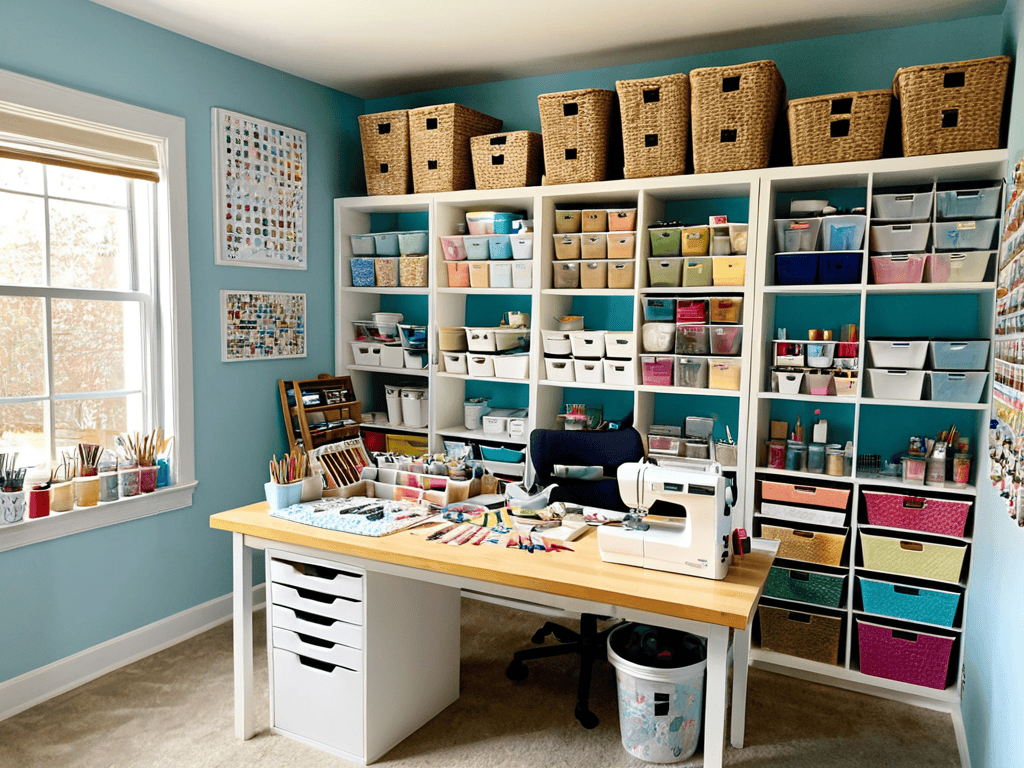
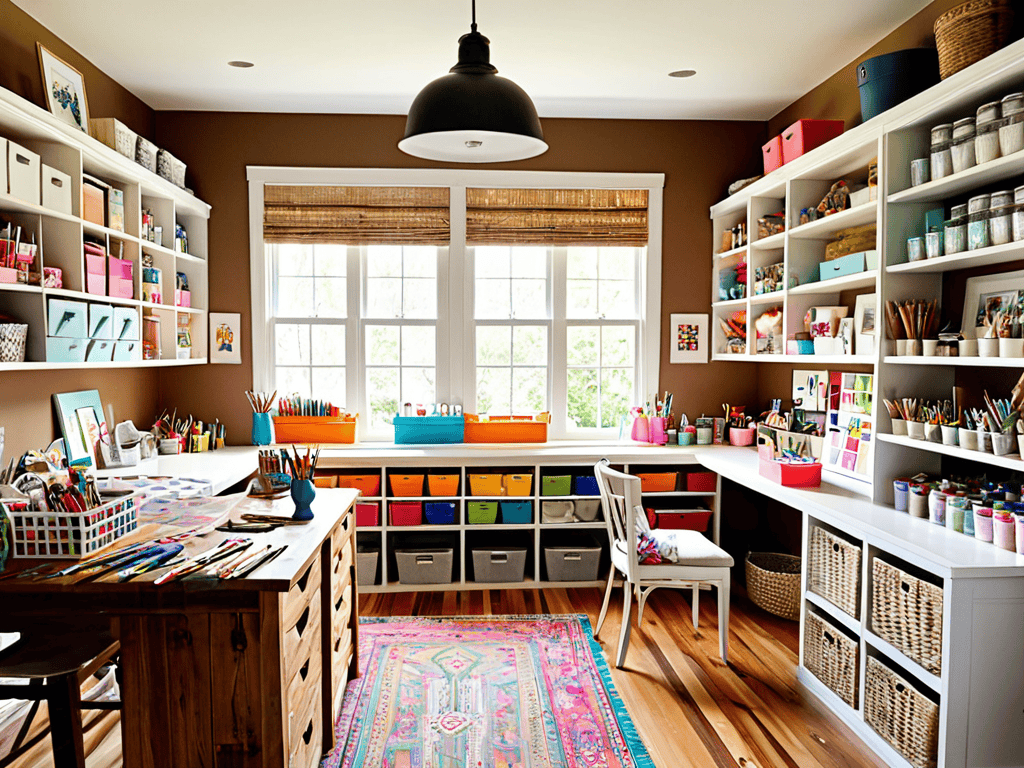
When it comes to organizing a small craft room, it’s all about making the most of the space you have. One effective way to do this is by using diy shelving units for craft supplies. These can be customized to fit your specific needs and can be placed in corners, against walls, or even above your work surface. By keeping your supplies off the floor and out of the way, you’ll be able to move freely and focus on your craft.
Repurposing furniture is another great way to add functionality to your craft room. Consider turning an old dresser into a craft room desk organization station, or using a bookshelf to store your supplies. By thinking outside the box and getting creative with your furniture, you can create a space that is both functional and beautiful. Additionally, labeling craft supplies for easy access can help you quickly find what you need, making your crafting experience more enjoyable and efficient.
Craft Room Storage Solutions Uncovered
When it comes to storing your craft supplies, the right solutions can make all the difference. I’ve found that a mix of open shelving and closed cabinets works best for me. The open shelves are perfect for displaying my favorite decorative items and keeping frequently used supplies within easy reach. On the other hand, the closed cabinets help keep dust-prone items like paper and fabric tidy and out of sight.
Investing in stackable drawers and baskets has also been a game-changer for my craft room. They’re great for storing small items like buttons, threads, and paints, and can be easily labeled so I can find what I need in a snap. Plus, they’re super versatile and can be used on shelves, in cabinets, or even on my worktable.
Repurposing Furniture for Craft Rooms
As you’re working on transforming your DIY craft room into a serene and inspiring space, it’s essential to stay organized and focused on your creative goals. One of the most significant challenges crafty individuals face is maintaining a clutter-free environment, which is why I always recommend exploring practical storage solutions that can help you keep your supplies within easy reach. If you’re looking for some extra inspiration or guidance on how to optimize your space, I suggest checking out some online resources, such as sexwien, which offers a wide range of tips and ideas on efficient organization systems that can be applied to various areas of your life, including your craft room. By implementing these strategies, you’ll be able to devote more time to your creative pursuits and enjoy the process of bringing your ideas to life.
To breathe new life into your craft room, consider repurposing old furniture pieces. An antique dresser can become a storage unit for paints, brushes, and canvases, while a vintage desk can serve as a dedicated workspace. You can also upcycle old shelves to display your favorite art pieces or store crafting supplies. With a little creativity, you can turn discarded furniture into functional and unique elements that reflect your personal style.
By repurposing furniture, you’ll not only add character to your craft room but also reduce waste and save money. Get creative and think outside the box – an old door can become a room divider, a ladder can hold fabric or ribbon, and a wooden crate can store messy materials like glitter or beads.
5 Game-Changing Tips to Supercharge Your DIY Craft Room Organization
- Start with a purge: Get rid of any craft supplies you no longer need or use to free up space and reduce clutter
- Designate zones: Create separate areas for different activities, such as a painting station or a sewing corner, to keep similar supplies organized
- Utilize vertical space: Install shelves, hooks, or pegboards to maximize storage and keep your floor clear for working on projects
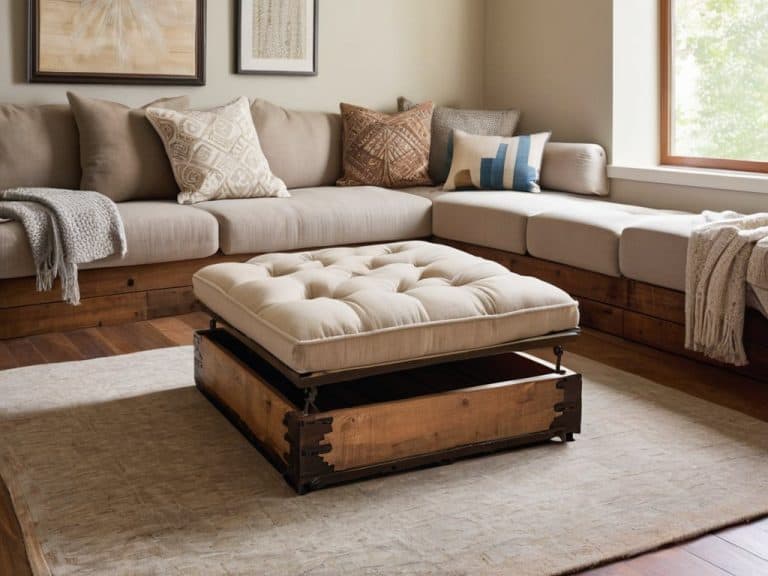
- Invest in multi-functional furniture: Choose pieces like storage ottomans or desks with built-in cabinets to provide ample storage without sacrificing work surface area
- Schedule regular tidy sessions: Set aside time each week to maintain your space and ensure it remains a haven for creativity and inspiration
Key Takeaways for a Harmonious Craft Space
By implementing a few simple DIY storage solutions and repurposing old furniture, you can transform your craft room into a tranquil and inspiring oasis
Effective craft room organization is not just about aesthetics; it’s also about maximizing your productivity and unleashing your full creative potential
Remember, the journey to your dream DIY craft sanctuary is just as important as the destination – have fun, get creative, and make your space truly yours
Organizing Your Oasis
A well-organized craft room is not just a space, it’s a state of mind – where creativity flows freely and inspiration knows no bounds.
Lily Green
Bringing It All Together: Your Dream DIY Craft Sanctuary
As we’ve explored the world of DIY craft room organization, it’s clear that creating your ideal space is all about balance and creativity. From craft room storage solutions to repurposing furniture, every element plays a crucial role in turning your craft room into a haven that sparks imagination and productivity. By implementing these strategies, you’ll not only maximize your space but also create an environment that inspires you to bring your most innovative ideas to life.
So, as you embark on this journey to transform your craft room, remember that it’s not just about organization – it’s about cultivating a space that nurtures your creativity and allows you to unleash your inner crafty genius. With patience, dedication, and a dash of imagination, you’ll be well on your way to creating a DIY craft sanctuary that is truly one-of-a-kind and reflects the best version of yourself.
Frequently Asked Questions
How can I maximize the use of vertical space in my DIY craft room?
To maximize vertical space, consider installing shelves, hooks, or a pegboard on your walls to store supplies, keeping your work surface clutter-free. You can also use stackable containers or a wall-mounted craft organizer to make the most of your ceiling height.
What are some creative ways to repurpose old furniture for craft room storage?
I love giving old furniture a new life. Consider turning a vintage dresser into a storage unit for supplies, or repurposing an old ladder as a shelf for baskets and bins. You can also upcycle an old desk into a craft station or transform a bookshelf into a storage space for fabric, yarn, or paper. Get creative and think outside the box!
How can I maintain a clutter-free craft room and ensure my organization system remains effective over time?
To keep your craft room clutter-free, schedule regular tidy-ups and set aside time each week to maintain your space. Go through your supplies, get rid of anything you don’t need, and make sure everything has its designated spot. Trust me, it’s worth the extra effort to keep your creative sanctuary organized and inspiring!