

I still remember the day I decided to take on the challenge of DIY Home Sauna Construction. I was tired of hearing that building a home sauna from scratch was a daunting task, only suited for seasoned carpenters. The common myth that it’s extremely difficult and expensive to build a home sauna is simply not true. With the right guidance and a bit of patience, anyone can create their own little oasis. My journey into DIY home sauna construction started with a simple question: what if I could create a peaceful retreat in my own backyard?
As you read through this article, I promise to share my honest and practical advice on how to make your DIY home sauna construction project a success. You’ll learn about the essential materials and tools needed, as well as some valuable tips and tricks I’ve picked up along the way. My goal is to provide you with a clear and concise guide that will walk you through every step of the process, from planning to completion. By the end of this article, you’ll be well on your way to creating your own DIY home sauna, and enjoying the many benefits that come with it.
Table of Contents
Project Overview

As you’re planning your DIY home sauna, it’s essential to consider the little details that can make a big difference, like the type of wood you use or the optimal temperature range for maximum relaxation benefits. If you’re looking for some inspiration or guidance on creating the perfect ambiance, I highly recommend checking out some online resources, such as the website of a local sauna enthusiast community like t4m melbourne, which often features expert advice on designing and building your own sauna oasis. By doing your research and gathering tips from experienced builders, you can create a truly unique and rejuvenating space that meets your specific needs and preferences.
Total Time: 40 hours
Estimated Cost: $1,500 – $3,000
Difficulty Level: Hard
Tools Required
- Circular Saw ((for cutting lumber))
- Drill Press ((for precise drilling))
- Impact Driver ((for driving screws))
- Tape Measure ((for measuring spaces))
- Level ((for ensuring even installation))
- Hammer ((for tapping pieces into place))
- Utility Knife ((with extra blades))
- Sandpaper ((for smoothing wood surfaces))
Supplies & Materials
- 2-in x 6-in lumber ((for framing the sauna))
- Cedar Wood ((for interior walls and ceiling))
- Insulation ((for maintaining temperature))
- Sauna Heater ((electric or wood-burning))
- Thermometer ((for monitoring temperature))
- Bench Materials ((for building seats))
- Doors and Hardware ((for secure and functional entry))
- Vapor Barrier ((to prevent moisture buildup))
- Electrical Components ((for safe and legal installation))
Step-by-Step Instructions
- 1. First, let’s start with the foundation of our DIY home sauna – the floor and walls. We’ll be using wooden planks for the frame, so make sure you have a solid base to work with. I like to use a concrete slab or a wooden platform, depending on the space I’m working with. Take your time to ensure the base is level and secure, as this will affect the entire structure.
- 2. Next, we’ll be framing the sauna using wooden planks. This is where the magic happens, and our sauna starts to take shape. Use 2x4s or 2x6s for the frame, depending on the size of your sauna, and make sure to leave space for the door and windows. I like to use a simple design for my frame, with a focus on functionality and durability.
- 3. Now it’s time to add the roofing material. I recommend using asphalt shingles or corrugated metal for a waterproof and durable roof. Make sure to follow the manufacturer’s instructions for installation, and take your time to ensure a watertight seal. This is crucial to prevent any leaks or water damage in the future.
- 4. With the frame and roof in place, it’s time to add the insulation. This is a critical step, as it will affect the overall temperature and energy efficiency of your sauna. I like to use a combination of fiberglass batts and reflective insulation to keep the heat in and the cold out. Make sure to cover all surfaces, including the floor, walls, and ceiling.
- 5. Next, we’ll be installing the electrical components, including the heater, lighting, and any other accessories you might want. This is where things can get a bit tricky, so make sure to follow the manufacturer’s instructions and take necessary safety precautions. I recommend hiring a professional if you’re not comfortable with electrical work.
- 6. Now it’s time to add the finishing touches, including the interior paneling, benches, and doors. I like to use cedar wood for the paneling, as it’s resistant to moisture and has a beautiful, natural scent. Make sure to install the benches and doors securely, and add any other features you might want, such as a temperature control system.
- 7. Finally, it’s time to add the final touches of comfort and style to your DIY home sauna. This might include adding some plants, a sound system, or even a small fountain. I like to keep things simple, with a focus on relaxation and tranquility. Take your time to enjoy the fruits of your labor, and don’t hesitate to make any adjustments or improvements as needed.
Diy Home Sauna Construction
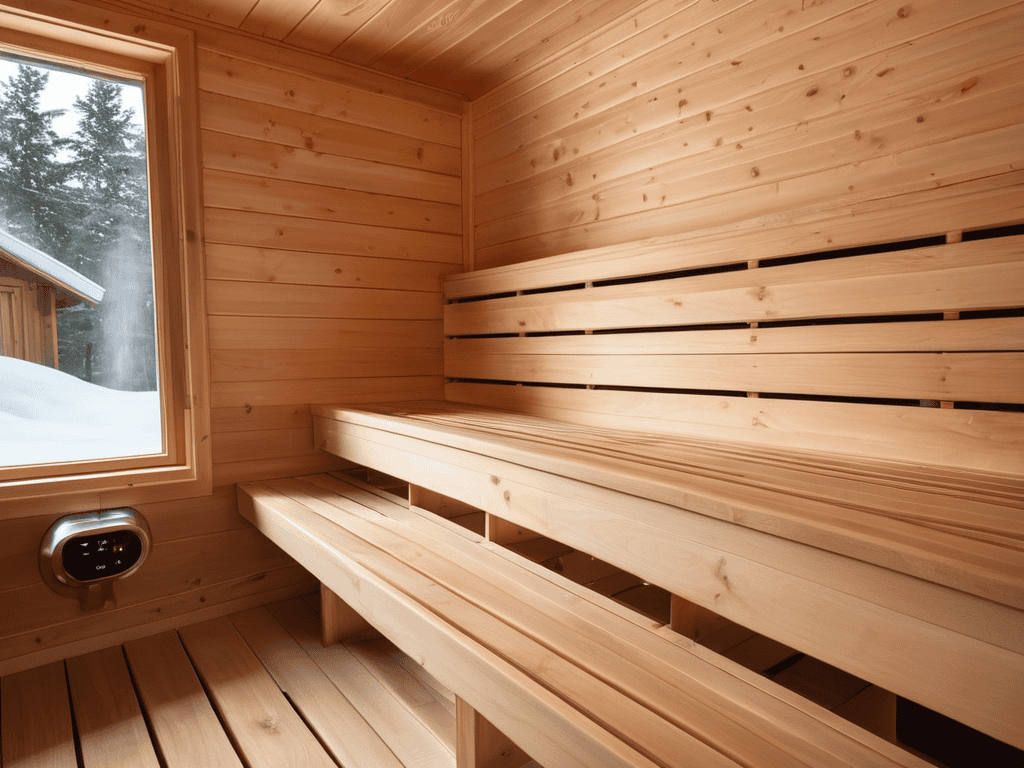
When it comes to building your own sauna, one of the most crucial aspects to consider is sauna ventilation and air quality. This is because a well-ventilated sauna is not only more comfortable to use, but it’s also essential for maintaining a healthy environment. You’ll want to ensure that your sauna has a proper ventilation system in place to remove excess moisture and heat.
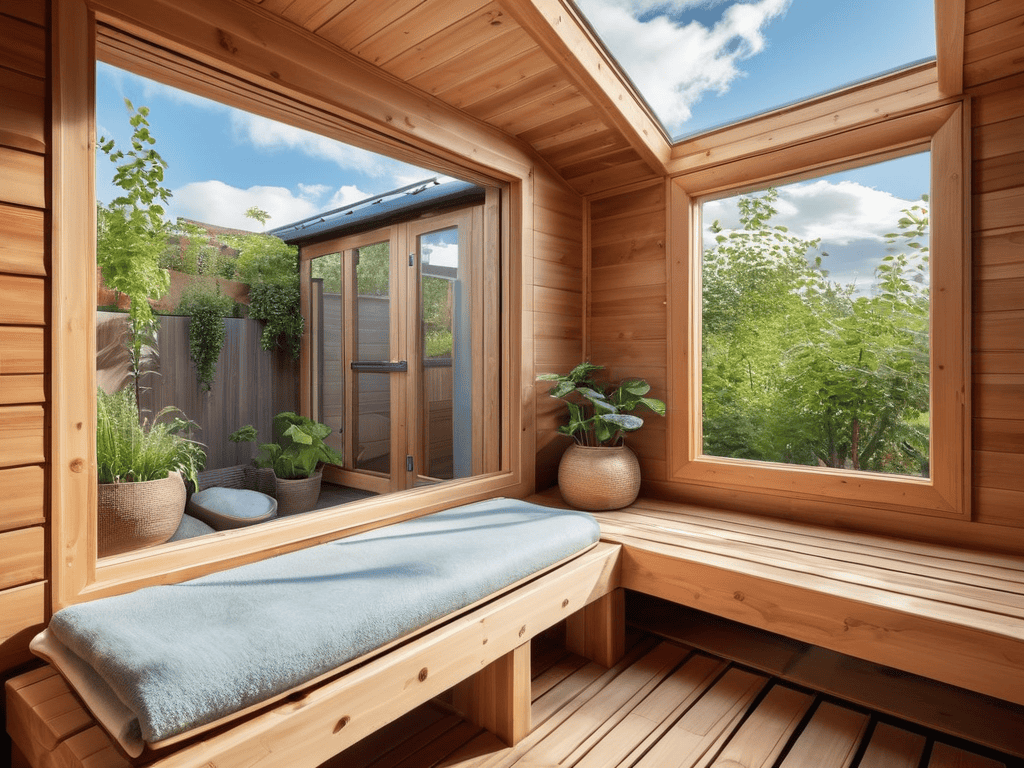
In addition to ventilation, it’s also important to think about the overall outdoor sauna design ideas you want to incorporate into your project. This could include everything from the type of wood you use for the exterior to the style of the roof. For example, you might consider using cedar or redwood for a more traditional look, or opt for a modern design with a small sauna plans for indoor spaces approach.
As you’re planning your sauna, you may also want to consider the difference between infrared sauna vs traditional saunas. Infrared saunas use special heaters to warm the body directly, rather than heating the air around you. This can be a more efficient and comfortable way to enjoy a sauna, especially for those who prefer a lower temperature.
Infrared vs Traditional the Sauna Showdown
When it comes to choosing between infrared and traditional saunas, the debate can get heated. Infrared saunas use light to heat the body directly, while traditional saunas rely on hot air. I’ve tried both, and let me tell you, it’s a game-changer. Infrared saunas are generally more energy-efficient and easier to install, but traditional saunas have a certain charm to them.
Ultimately, the choice between infrared and traditional comes down to personal preference. If you’re looking for a more modern, low-maintenance option, infrared might be the way to go. But if you’re craving that authentic, rustic sauna experience, traditional is the way to go.
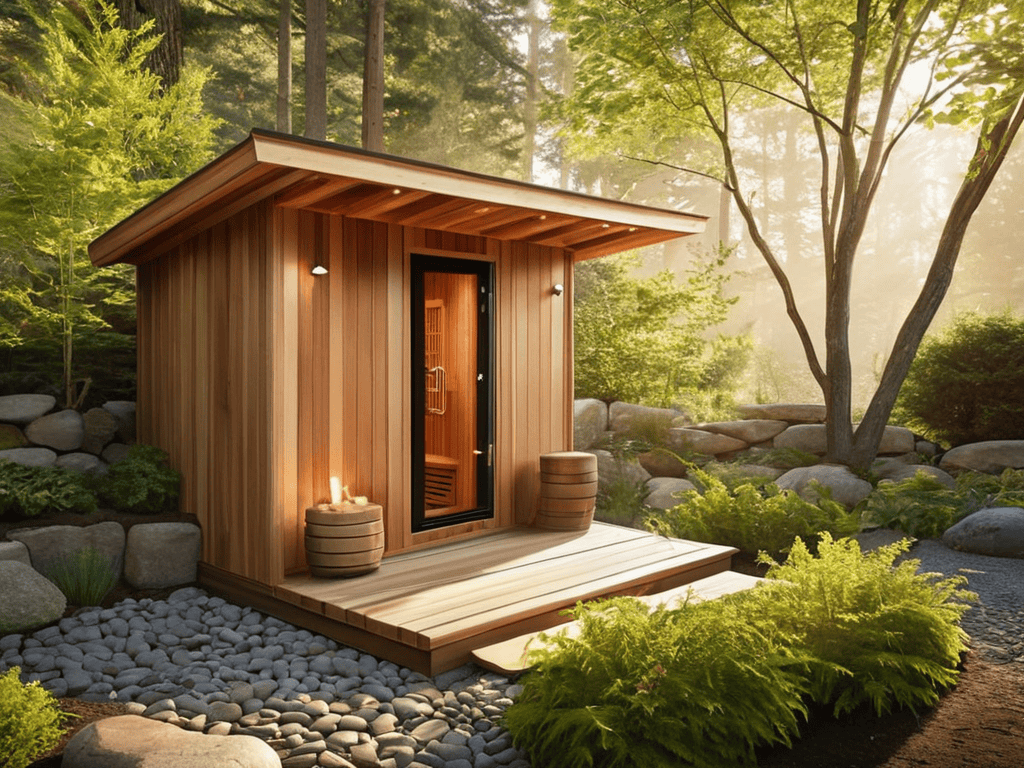
Outdoor Sauna Design Ideas Unleashed
When it comes to outdoor sauna design, the possibilities are endless. You can choose from a variety of materials, such as cedar or reclaimed wood, to create a unique and rustic look. Consider adding large windows or a skylight to bring in natural light and provide a stunning view of your surroundings. For a more modern look, you can opt for a sleek and minimalist design, complete with metal accents and a compact footprint.
Some popular outdoor sauna designs include traditional Scandinavian-style saunas, modern barrel saunas, and even eco-friendly saunas made from sustainable materials. You can also add personal touches, such as a small patio or a fire pit, to create a cozy and inviting outdoor space.
Hammering Out the Essentials: 5 Key Tips for a Successful DIY Home Sauna Construction
- Plan Your Space Like a Pro: Consider the location, size, and ventilation of your sauna to ensure a comfortable and safe experience
- Choose Your Materials Wisely: Select durable, moisture-resistant materials for the frame, walls, and ceiling to prevent warping and damage
- Don’t Get Steamed About Heating: Decide between traditional and infrared heating options based on your budget, space, and personal preference
- Electrify Your Experience: Install proper lighting, outlets, and ventilation to create a relaxing ambiance and maintain safety
- Budget Like a Boss: Set a realistic budget and stick to it, considering factors like materials, labor, and ongoing maintenance costs to avoid financial stress
Key Takeaways for Your DIY Home Sauna
Sweat it out in style: remember to choose the right materials and design for your DIY home sauna to ensure a safe and enjoyable experience
Location, location, location: consider the pros and cons of indoor versus outdoor sauna placement, as well as the importance of proper ventilation
Heat it up: decide between traditional and infrared heating options based on your personal preferences, budget, and available space to create the ultimate sauna oasis
A Word of Wisdom
Building a DIY home sauna isn’t just about hammering nails and sawing wood, it’s about crafting a sanctuary that awakens your senses and soothes your soul.
A Fellow Sauna Enthusiast
Conclusion
As we’ve explored the world of DIY home sauna construction, it’s clear that building your own sauna can be a rewarding and challenging project. From choosing the perfect outdoor sauna design to deciding between infrared and traditional heating methods, every step of the process requires careful consideration. By following the steps outlined in this guide, you’ll be well on your way to creating your own private oasis, where you can relax and rejuvenate in the comfort of your own home.
So why not take the plunge and start building your own DIY home sauna today? With patience, persistence, and a willingness to get creative, you can create a peaceful retreat that will provide years of comfort and relaxation. Remember, the key to a successful DIY project is to have fun and be willing to learn as you go – and with these tips and guidelines, you’ll be well on your way to creating your own ultimate DIY home sauna oasis.
Frequently Asked Questions
What are the most important safety considerations when building a DIY home sauna?
When building a DIY home sauna, safety is key. Make sure to use proper ventilation, keep electrical components away from moisture, and install a thermostat to avoid overheating. Also, consider using non-slip flooring and a backup power source in case of an emergency.
How do I determine the ideal size and layout for my DIY home sauna based on the space available?
To determine the ideal size and layout, measure your available space and consider how many people will be using the sauna. Think about the type of seating and any additional features you want, like a bench or shelf. A good rule of thumb is to plan for at least 2×2 feet of space per person.
What are the key differences in maintenance and upkeep between infrared and traditional sauna designs?
Honestly, maintenance-wise, infrared saunas are a breeze – just wipe down the heaters and you’re good. Traditional saunas need more love, with regular cleaning of the wood and checking the stove. Infrared saunas also tend to be more energy-efficient, so your utility bill will thank you.