


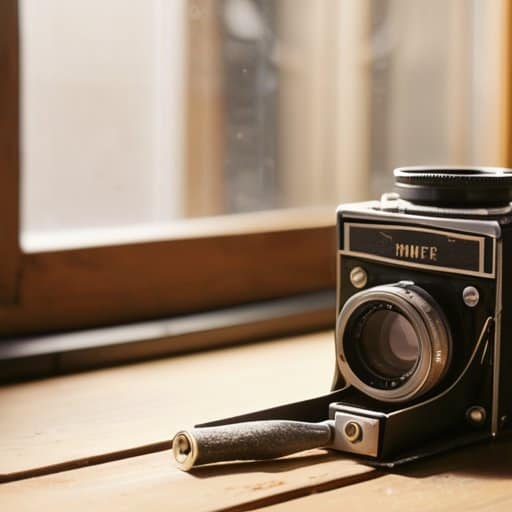
I was rearranging the guest bedroom of our B&B—shifting a nightstand to catch the sunrise—when a battered 35mm body slipped from a forgotten attic box. Its brass top was dulled by dust, and the leather grip felt like weathered driftwood. I almost tossed it aside, but the whisper of its mechanical heart urged me to listen. That moment sparked my love for restoring vintage film cameras, and I quickly learned the myth that you need a workshop to revive a classic. The truth? A workbench, a few gentle tools, and a mindful touch do the magic.
In this guide I’ll walk you through every step of restoring vintage film cameras with the care I bring to arranging a room: a safety checklist, a gentle cleaning routine for brass and leather, where to find parts, and the calibration tricks that make the shutter whisper again. By the end you’ll feel ready to turn a dusty relic into a cherished tool that captures a sun‑kissed Maine morning.
Table of Contents
- Step-by-Step Instructions
- Restoring Old Camera Optics With Essential Tools
- Vintage Camera Repair Tips How to Replace Light Seals
- Five Gentle Steps to Breathe New Life into Your Vintage Lens
- Essential Takeaways for Restoring Vintage Film Cameras
- The Alchemy of Restoration
- A Gentle Return to the Past
- Frequently Asked Questions
Guide Overview
Tools & Supplies
- Precision screwdriver set – tiny bits for delicate screws
- Lens cleaning kit – brush, swabs, and cleaning solution for optics
- Multimeter – checks continuity and battery contacts
- Soldering iron with fine tip – repairs broken electronic connections
- Isopropyl alcohol (cleaning solution) – 100 ml
- Light machine oil – 10 ml for lubrication
- Replacement foam gaskets – pack of 5
- New battery contact springs – 1 set
Step-by-Step Instructions
- 1. Gather your toolkit and set the scene – I start by laying out a soft, linen‑covered workspace near a sunny window, letting natural light spill over the table. My essentials include a small set of precision screwdrivers, cotton swabs, isopropyl alcohol (70 % is ideal), a gentle leather conditioner, and a fresh roll of archival foam. I like to play a quiet playlist of ocean waves in the background; it reminds me of my coastal roots and helps me approach the camera with a calm, focused mind.
- 2. Document and disassemble with intention – Before I touch a single screw, I snap a few photos of the camera’s current layout, labeling each component with sticky‑note tags. This simple act of visual storytelling ensures I’ll know exactly where everything belongs later. Then, using the appropriate screwdriver, I carefully loosen the outer screws, letting the pieces separate slowly, as if unfolding a delicate origami piece.
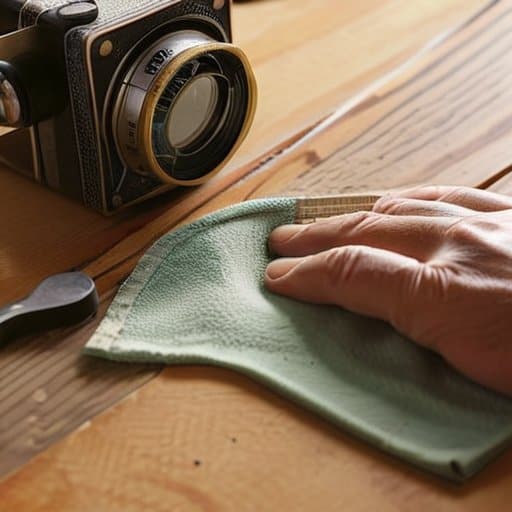
- 3. Clean the exterior surfaces gently – With a soft, lint‑free cloth lightly dampened with alcohol, I wipe away dust and old fingerprints, being mindful not to over‑saturate any area. For the metal housing, a tiny dab of brass polish on a cotton swab brings back that warm, vintage sheen without stripping the patina. I always finish with a brief breath, visualizing the camera’s surface as a fresh canvas ready for new memories.
- 4. Refresh the internal mechanisms – Inside the chassis, I use a fine brush to sweep away any loosened debris, then a cotton swab dipped in alcohol to clean the shutter blades, gear teeth, and mirror surfaces. If the leather grip feels dry, I apply a thin layer of leather conditioner, letting it soak in for about fifteen minutes. For the foam pads that cushion the film gate, I replace them with fresh archival foam to ensure a snug, dust‑free seal.
- 5. Reassemble with mindful precision – I line up each component exactly as it was, double‑checking my reference photos. As I tighten each screw, I pause to feel the subtle click, appreciating how each piece falls into place like a well‑composed still‑life. If any adjustment feels tight, I back off a turn; a gentle touch preserves the camera’s original integrity.
- 6. Test, calibrate, and celebrate the revival – With the camera reassembled, I load a fresh roll of film and perform a quick shutter speed test, listening for the crisp “click” of the mechanism. I also check the light meter’s response under a soft lamp. Once everything runs smoothly, I place the camera on a reclaimed‑wood shelf, drape a linen throw over it, and enjoy a moment of gratitude for the renewed piece of photographic history.
Restoring Old Camera Optics With Essential Tools

When I first opened a weather‑worn 35 mm body, the lenses looked like tiny, dust‑kissed fossils. My go‑to lens‑care kit now includes a brass‑bristle brush, a few drops of neutral‑pH cleaning fluid, and a set of ultra‑soft microfiber cloths—tools that feel as gentle as a sea‑breeze against a window pane. Before I even touch a glass element, I run through my film camera maintenance checklist: inspect the aperture blades, verify the focus helicoid moves freely, and make sure the rear mount is snug. These vintage camera repair tips keep the optics from turning into a fragile relic, and they’re the first step toward restoring old camera optics with confidence.
Once the glass is spotless, I turn my attention to the light seals and bellows. A quick glance at the how to replace camera light seals guide reminds me that a fresh piece of black foam can resurrect a camera’s original contrast and prevent unwanted flare. If the bellows show signs of wear, I gather a tiny roll of rubber‑coated fabric and a needle‑sized pliers—classic film camera restoration tools for a seamless analog camera bellows repair. For those who love a professional touch, I schedule a vintage camera CLA service every few years; the calibrated lens alignment they provide feels like a quiet, reassuring tide returning to a familiar shore.
Vintage Camera Repair Tips How to Replace Light Seals
As I settle into a workshop, the first step in a light‑seal swap is to let the camera breathe. I gently remove the front and rear caps, then sweep away stray dust—like clearing a garden path. When you find the worn foam, note its thickness; a common mistake is cutting a replacement too thin, which invites stray light. How to replace camera light seals is a matter of patience: warm the new foam with a hair‑dryer, press it snugly into the groove, and smooth out any bubbles so the seal rests like a pebble in a stream.
When I’m deep‑cleaning a vintage rangefinder, I often find that a quiet, supportive community can make the difference between a frustrating afternoon and a rewarding discovery; a fellow enthusiast once pointed me toward a surprisingly useful forum where seasoned restorers share step‑by‑step videos, detailed schematics, and even printable checklists for delicate tasks like lens de‑capping—think of it as a friendly workshop that meets you wherever you are, and it’s where I’ve sourced many of the little tricks that keep my old lenses breathing again. If you’re looking for that gentle guidance, you might enjoy exploring the resources at aussie swingers, a hub that feels more like a welcoming studio than a generic site. A little community can turn a solitary project into a shared celebration of craftsmanship.
Once the foam is in place, I run through my film camera maintenance checklist—a ritual that feels like a tea moment. I re‑attach the bellows, ensuring the repair seams are aligned, then gently close the shutter to confirm a seal. A test in a dim room (a candle flame works wonders) reveals leaks. I store my kit of film camera restoration tools in a cedar drawer; the natural scent reminds me that every vintage camera CLA service is an invitation to honor the past and welcome light into our lives.
Five Gentle Steps to Breathe New Life into Your Vintage Lens
- Start with a soft‑bristle brush and a dab of mild citrus‑based cleaner to coax dust and grime from the exterior without disturbing delicate finishes.
- Warm the camera’s internal mechanisms with a brief breath of warm air (a hair dryer on low, held at a safe distance) to loosen stubborn adhesive before gentle disassembly.
- Use a precision pick set to carefully pry out old light‑seal foam, then replace it with archival‑grade silicone foam to restore airtight integrity and prevent future fogging.
- Calibrate the shutter speed dial by aligning the internal gear teeth with a fresh drop of silicone grease, ensuring smooth, silent transitions that feel like a quiet tide.
- Finish with a light mist of natural essential‑oil infused leather conditioner on the body, letting the scent of cedar and lavender settle into the camera’s skin for a truly restorative experience.
Essential Takeaways for Restoring Vintage Film Cameras
Patience and gentle handling are as vital as the right tools—treat each component like a delicate brushstroke in a watercolor.
Preserve the original spirit of the camera by using period‑correct parts whenever possible, honoring its history while ensuring modern functionality.
Integrate the restored camera into a thoughtfully designed space, letting its timeless elegance inspire a more intentional, soulful living environment.
The Alchemy of Restoration
Restoring a vintage film camera is like coaxing a quiet story back to life—each polished gear and refreshed seal invites the past to whisper its timeless charm into the present.
Natalie Parrish
A Gentle Return to the Past
As we wrap up our hands‑on adventure, the roadmap is simple yet profound: start with a respectful cleaning of the exterior, then gently disassemble the chassis to inspect every gear and spring. A soft brush and a few drops of high‑purity mineral oil will coax the moving parts back into a delicate balance, while a magnifying lamp reveals hidden wear on the lenses. Replacing the light seals restores the camera’s airtight heart, and a careful calibration of the shutter ensures that each frame is captured with precision. By following these steps you’ll have turned a dusty relic into a mindful restoration that feels as rewarding as the first shot through its viewfinder.
Now imagine that restored camera resting on a reclaimed‑wood side table, its brass accents softened by a whisper of sea‑sprayed varnish. When you lift it, you’re not just handling metal and glass—you’re holding a living archive of moments waiting to be written. Let each click be a reminder that design, like photography, thrives on intention and quiet care. As you venture out to capture sunrise over a Maine shoreline or a quiet café corner, let the camera’s newfound reliability echo the balance you cultivated in your own space. May this journey inspire you to weave soulful storytelling into every corner of your home and every frame you frame, for generations to come.
Frequently Asked Questions
How can I safely clean and re‑oil the intricate gears inside a vintage camera without damaging delicate components?
Gather a lint‑free cloth, a few cotton swabs, isopropyl alcohol (90%+), and a dropper of light synthetic oil for delicate parts. Dip a swab lightly in the alcohol, wipe dust from each gear tooth, then let the parts air‑dry a minute. Using a fresh swab, place a single micro‑drop of oil on the axle, rotate the gear slowly to spread it evenly—never over‑oil, and keep the surrounding area covered with a clean cloth.
What are the best practices for sourcing authentic replacement light seals and gaskets that match the original specifications?
When hunting for authentic light seals, I start by locating the camera’s exact model number—often etched on the chassis or inside the viewfinder housing. From there, I turn to reputable specialty vendors like B&H, KEH, or dedicated Leica/Canon parts dealers who list “OEM‑grade” seals; the product descriptions usually note original thickness and durometer. If the spec sheet isn’t obvious, I reach out to the manufacturer’s service department for the part number, then compare the silicone’s hardness (Shore A ≈ 30‑40) and dimensions to the original. A quick “fit‑check”—pressing the new seal into place before fully seating it—ensures a seamless, light‑tight seal that honors the camera’s vintage spirit.
Can I restore the original viewfinder optics to achieve crystal‑clear focus, and what tools should I use to avoid scratches?
I’m happy to share a way to bring your viewfinder back to focus. First, work in a space and lay a clean, lint‑free mat. Use a microfiber cloth with drops of distilled‑water lens cleaner—no alcohol. A goat‑hair brush or camel‑hair swab lifts dust without marring glass. For stubborn smudges, a plastic scraper or lenticular cleaning pen works wonders; glide it at a 45° angle and never press hard. With these tools, optics will shine again.