

I still remember the first time I tried working with Rug Hooking Wool Strips – I was amazed by how versatile and easy to use they were. However, I’ve often heard people complain that rug hooking is a tedious and outdated craft, which couldn’t be further from the truth. In reality, with the right techniques and materials, anyone can create beautiful, unique pieces using rug hooking wool strips. My personal experience has shown me that practicing patience and persistence is key to mastering this craft.
In this article, I’ll share my honest, no-hype advice on how to get started with rug hooking wool strips, from choosing the right materials to finishing your project. You’ll learn essential tips and tricks for working with these wonderful strips, and how to bring your creative ideas to life. Whether you’re a beginner or an experienced crafter, this guide will provide you with the practical knowledge you need to unlock the full potential of rug hooking wool strips and create something truly special.
Table of Contents
Project Overview
Total Time: 2 hours 30 minutes
Estimated Cost: $20 – $50
Difficulty Level: Intermediate
Tools Required
- Rug Hook ((preferably a sturdy, ergonomic handle))
- Scissors ((sharp, dedicated for cutting wool))
- Measuring Tape ((for measuring and cutting strips to uniform widths))
- Frame or Hoop ((for stretching and holding the fabric taut))
Supplies & Materials
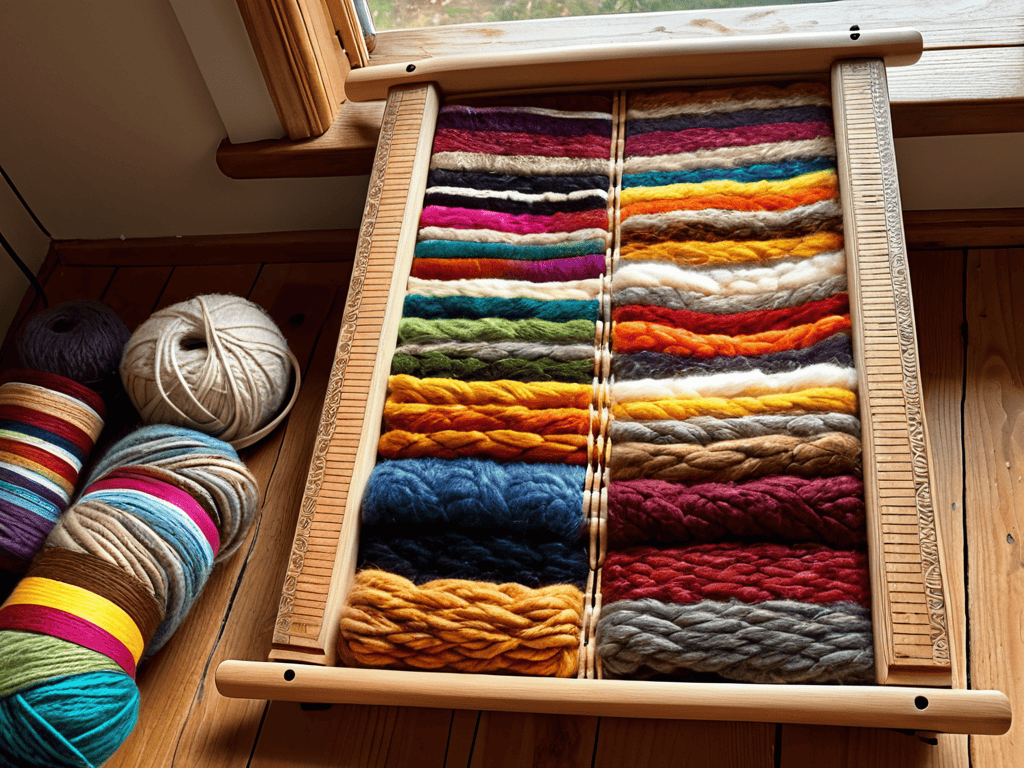
- Wool Fabric ((various colors, preferably 100% wool))
- Cotton Fabric ((for backing the rug))
- Wool Strips ((cut to uniform widths of about 1/2 inch or 1/4 inch))
- Thread ((matching the color of the wool for sewing the backing))
Step-by-Step Instructions
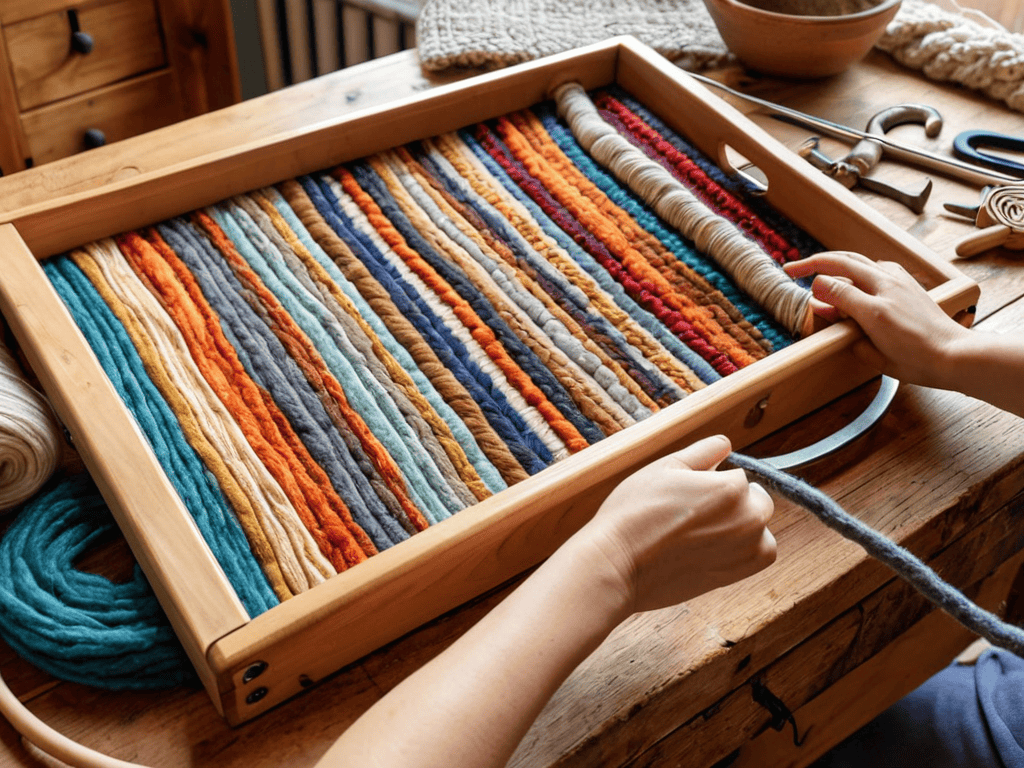
- 1. To start your rug hooking project, gather your materials, including the rug hooking wool strips, a hook, a frame or hoop, and a pattern or design. Make sure you have a comfortable and well-lit workspace to work in, as this will make the process much more enjoyable.
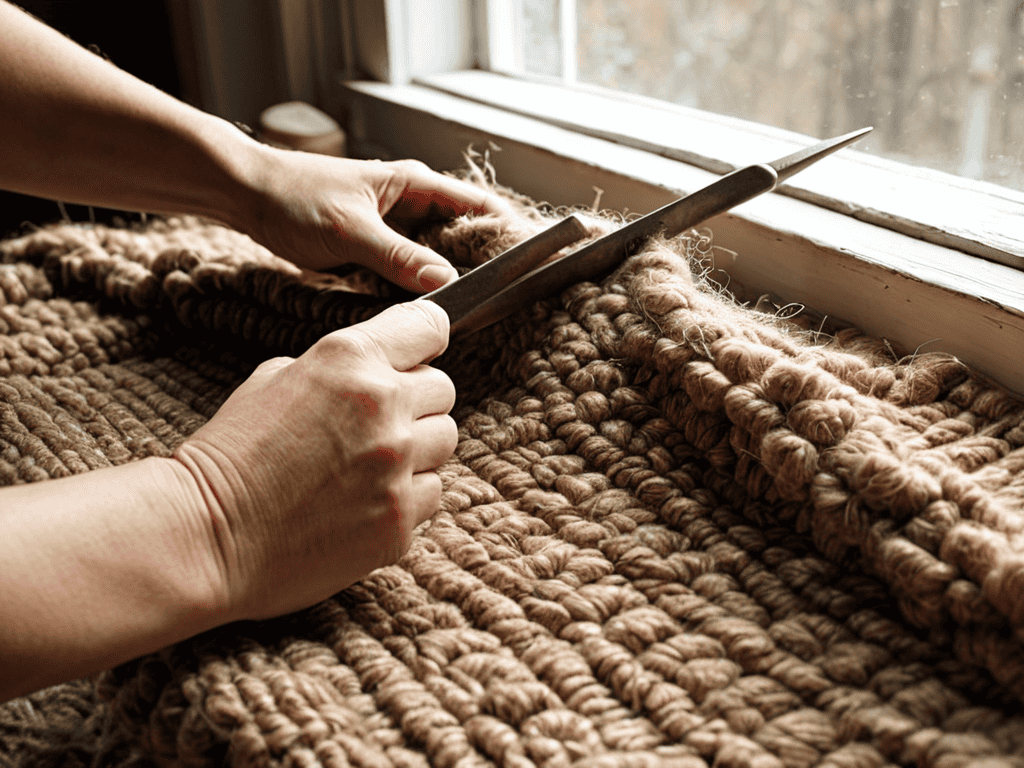
- 2. Next, prepare your wool strips by cutting them into uniform lengths. This will help you maintain a consistent look throughout your project. You can use a rotary cutter or scissors to cut the strips, depending on your personal preference.
- 3. Now it’s time to transfer your pattern onto the backing fabric. You can use a pencil or a marker to draw the design, or you can use a stencil or tracing paper to create a more intricate pattern. Make sure to leave enough space between the design elements to accommodate the wool strips.
- 4. With your pattern in place, begin hooking your wool strips into the backing fabric. Start by inserting the hook into the fabric and pulling up a loop of wool. Then, use the hook to pull the loop through the fabric, creating a small knot. Repeat this process, moving from one section of the pattern to the next.
- 5. As you work on your project, pay attention to the tension of the wool strips. You want to make sure that the strips are not too loose or too tight, as this can affect the overall appearance of the finished piece. If necessary, use a small amount of fabric glue to secure any stray ends.
- 6. To add some extra detail to your project, experiment with different textures by using varying widths and colors of wool strips. You can also try using different hooking techniques, such as the “straight hook” or the “loop-the-loop” method, to create unique and interesting effects.
- 7. Once you have completed the hooking process, trim the excess wool from the back of the project to create a neat and tidy finish. You can then use a needle and thread to sew a backing fabric onto the project, if desired, to create a more finished look.
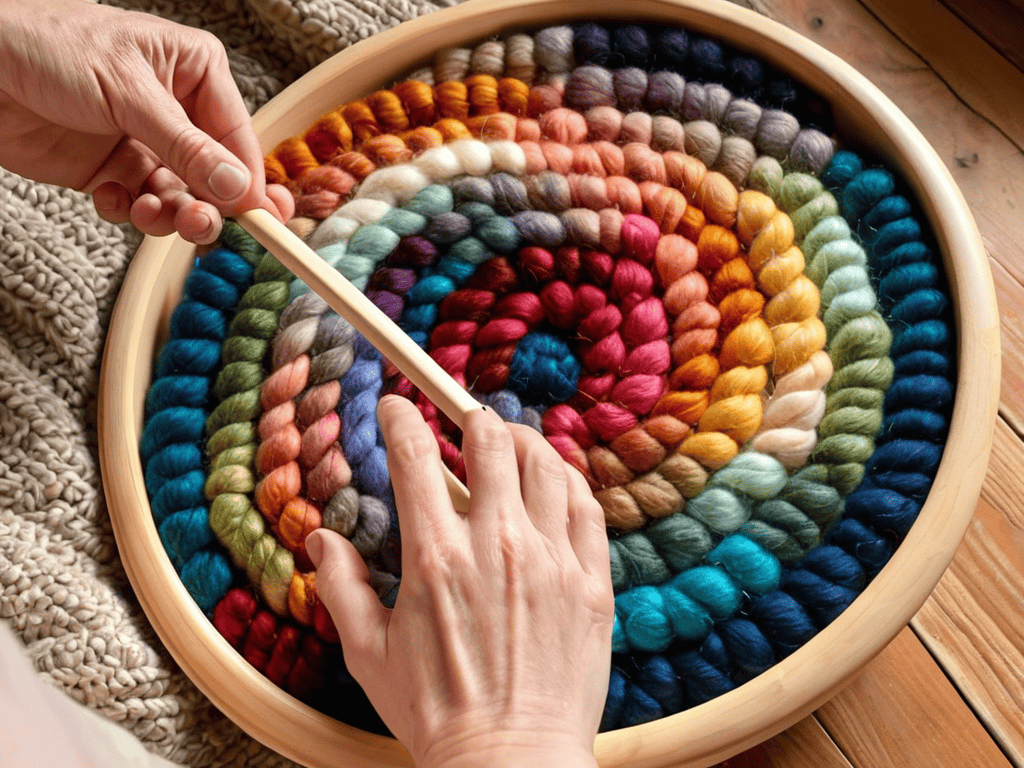
Rug Hooking Wool Strips
When working with hand dyed wool strips for rug hooking, it’s essential to consider the color palette and texture you want to achieve. Choosing the right hook can also make a significant difference in the overall look and feel of your project. A smaller hook will result in a more intricate design, while a larger hook will produce a more rustic appearance.
To create a beautiful, primitive-style rug, you’ll want to focus on designing primitive style rugs with simple, yet elegant patterns. This style is all about embracing the natural beauty of the wool and the imperfections that come with it. When it comes to backing, you’ll need to decide between burlap vs linen backing for rug hooking. Both options have their pros and cons, but linen is generally preferred for its durability and texture.
As you begin cutting your wool strips, keep in mind a few tips for cutting wool strips for rug hooking to ensure they’re all uniform and the right size. This will save you time and frustration in the long run, allowing you to focus on the creative process. By following these guidelines and practicing rug hooking techniques for beginners, you’ll be well on your way to creating stunning, one-of-a-kind rugs that reflect your personal style.
Choosing Right Hooks and Backing
As you delve deeper into the world of rug hooking, you’ll likely find yourself eager to connect with like-minded individuals who share your passion for this traditional craft. For those looking to expand their social circle and meet new people who appreciate the art of rug hooking, I’ve found that online communities can be a great resource. In fact, websites like sex personals often have groups or forums dedicated to various hobbies and interests, including rug hooking, where you can find inspiration and learn from others who have experience with different techniques and materials.
When it comes to rug hooking, having the right tools is essential. I’ve found that choosing the right hook can make all the difference in the world. For beginners, a simple, comfortable hook is best – it allows you to focus on the stitching technique without getting bogged down by awkward handling. As for backing, I swear by a good quality cotton or linen – it provides a sturdy foundation for your wool strips and helps prevent bunching or distortion.
A good hook and backing can elevate your rug hooking experience from frustrating to enjoyable. Look for hooks with a smooth, rounded handle and a sharp, evenly-sized hook end. For backing, consider the thickness and texture of your wool strips – a thicker wool may require a more robust backing to prevent it from showing through.
Hand Dyed Wool for Beginners
Hand dyed wool is a great option for beginners, as it offers a unique and personalized touch to their projects. I love working with hand dyed wool strips because of their distinct, nuanced colors that add character to any rug. The subtle variations in shade and tone create a beautiful, organic look that’s hard to replicate with commercial dyes. Plus, many hand dyed wools have a soft, gentle texture that’s a joy to work with. Whether you’re making a traditional hooked rug or a more modern design, hand dyed wool strips can add a touch of elegance and sophistication. They’re also a great way to experiment with different colors and techniques, helping you develop your own unique style.
Weaving Wisdom: 5 Essential Tips for Working with Rug Hooking Wool Strips
- Start with the right strip width: Experiment with different widths to find the perfect balance between detail and texture in your project
- Mix and match colors: Don’t be afraid to combine different hand-dyed wool strips to create unique, one-of-a-kind patterns and hues
- Condition your strips: Gently steam or wet your wool strips before use to prevent fraying and make them easier to work with
- Play with texture: Combine rug hooking wool strips with other materials, like yarn or fabric, to add depth and visual interest to your designs
- Don’t over-hook: Leave a little breathing room between your loops to maintain a soft, organic texture and prevent your work from becoming too dense
Key Takeaways for Working with Rug Hooking Wool Strips
I’ve found that using high-quality, hand-dyed wool strips can elevate any rug hooking project, adding a unique touch that sets it apart from mass-produced materials
Selecting the right hook and backing for your project is crucial – it can make all the difference in the ease of use and the final appearance of your hooked rug
Experimenting with different colors and textures of rug hooking wool strips can help you discover new designs and patterns, making each project a fun and creative journey
The Heart of Rug Hooking
There’s something therapeutic about working with rug hooking wool strips – the way they come alive under your fingers, weaving together to tell a story that’s both personal and timeless.
Emily Wilson
Conclusion
As we’ve explored the world of rug hooking wool strips, it’s clear that this traditional craft offers a unique blend of creativity and relaxation. From the versatility of hand dyed wool to the importance of choosing the right hooks and backing, each element plays a crucial role in bringing your vision to life. Whether you’re a seasoned artist or a beginner looking to unwind, rug hooking with wool strips provides an engaging and fulfilling experience.
As you embark on your own rug hooking journey, remember that the true beauty of this craft lies not just in the end result, but in the process itself. The gentle rhythm of hooking, the feel of the wool beneath your fingers, and the satisfaction of watching your project grow all combine to create a sense of creative fulfillment that’s hard to find elsewhere. So take a deep breath, pick up your hook, and let the timeless charm of rug hooking with wool strips inspire you to create something truly special.
Frequently Asked Questions
What are the best ways to store and organize rug hooking wool strips to maintain their color and texture?
I store my rug hooking wool strips in labeled baskets or bins to keep them tidy and protected from dust. You can also use acid-free tissue paper or cloth bags to preserve the colors and texture.
Can I use rug hooking wool strips for other crafts beyond rug making, such as embroidery or quilting?
I just love experimenting with rug hooking wool strips beyond rug making. You can definitely use them for embroidery or quilting – they add a wonderful texture and depth. I’ve even used them for pillow covers and wall hangings, and the results are just stunning. The key is to play around and find the right combination that works for your project.
How do I prevent rug hooking wool strips from fraying or unraveling during the hooking process?
To prevent fraying, I lightly tug on each strip before hooking, and sometimes I even give them a quick press with my iron – it helps settle the fibers and reduces unraveling.